
Best Telescope Reflectors
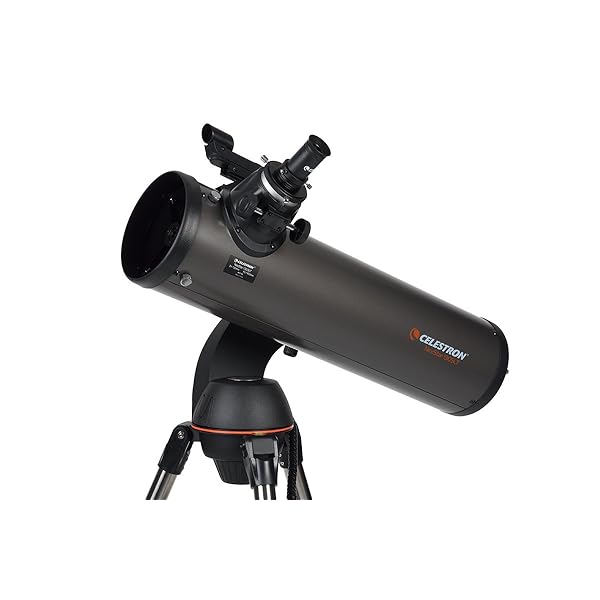
With its pre-assembled, adjustable steel tripod, quick release fork arm mount, and accessory tray, the nexstar 130 slt can be up and ready to use in a matter of minutes with no tools needed. View the details of the lunar surface, the rings of Saturn, the polar ice caps on mars, the cloud belts on Jupiter or a number of the Messier objects using the additional light-gathering capabilities of the 130 slt's 5 inch primary mirror. When I use an optional 32mm Plossl eyepiece, the famous Double Cluster in Perseus looks like a display of celestial fireworks with streamers of stars trailing across the 2 degree field of view. And when I add a 2x Barlow lens to the 9mm eyepiece for a total magnification of 144x, I can easily see cloud bands on the planet Jupiter and pick up detail in Saturn’s rings. Reflector telescopes offer more light gathering power per dollar than any other design, but that value is balanced by the fact that the mirrors may need to be aligned or "collimated" occasionally. An optional PowerTank battery is a handy way to power the NexStar 130 SLT, and I like to keep the tripod legs short and observe while seated because this gives me a solid and comfortable view. Focal ratio: 5; focal length of eyepiece 1/2: 25mm/9mm.Before you can begin observing, you must setup your hand control, align your finderscope and align your telescope. Focal length: 650mm.
Reviews
Find Best Price at Amazon"With eyepieces, the lower the number the higher the magnification. Lower magnification eyepiece (>35mm) will result in an exit pupil that is too large (makes it difficult to see without a moving black blob appearing in the eyepiece). If you picked a city instead of entering a latitude longitude, and you don't actually live in the middle of the city (you just picked the closest one), do a factory reset of the computer and choose latitude-longitude instead. You can find the latitude longitude with a smart-phone app (e.g. Compass for Android) or by googling your address. You'll need the lat long in degrees, minutes, seconds (not the digital version like -117.0101). I am about 20-30 miles outside the city I chose and it makes a big difference when the scope is skewing. I use Google Skymap to find one of the stars in the list if I don't know the name or the ones I do know are obscured. If you use the 3-star align, chose bright stars that are on opposite sides of the sky and not in a line (a triangle pattern is preferred). For example, if you just used the stars in Orion, that's probably too small of an area of the sky. Choose one star in Orion (e.g. Betelgeuse), one in Gemini (e.g. Castor) and one in Cassiopeia. I'm getting pretty good images with it doing short exposure (<15seconds) and stacking. I purchased an Orion Accufocus which greatly helps with focusing the image without everything shaking. The deep space objects won't appear that clear when viewing through the eyepiece (cameras pick up more light than our night vision does). It will calculate and give you a list of 5 bright stars with #1 being closest to the object. The scope will slew to the object and there's a good chance it will be centered in your eyepiece. You should easily find the object in the field of view of a 25mm eyepiece (though it may be faint and fuzzy)."
"It was small enough that I could transport it to and from the local astronomy club, which is a big plug for a beginner. An 8" Dob is great if your backyard is dark, not so much if you need to travel for some darker skies.The GoTo functionality is also a plus in my book, as my wife has never used a telescope, and showing her how to check out Jupiter in just a couple minutes was pretty incredible. After tightening the bolts on here, I would say the vibrations are only a slight annoyance, and as long you don't manhandle the focuser or smack the eyepiece when you're viewing, they calm down quickly. Whenever I punch in my GPS coordinates (compass app on iPhone by default) it aligns immediately on SkyAlign. You'll need to add a few things to this telescope to really make it complete, but you aren't hamstrung up front by any means. This thing will eat your 8 AA batteries in no time, buy the AC adapter, or better yet the Power Tank, which is a pretty impressive piece of kit. HomeDepot sells an 18" Husky tool bag with a strap that works PERFECTLY."
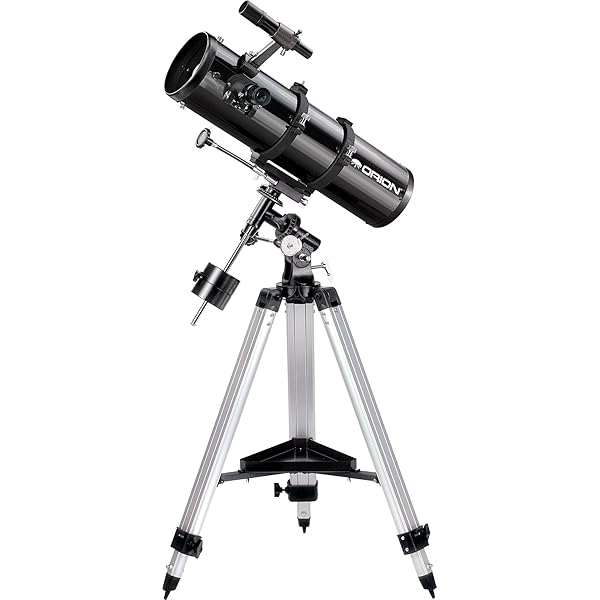
Our largest aperture SpaceProbe reflector telescope is the niftiest Newtonian reflector on an equatorial mount we've seen in a long time. The Orion SpaceProbe 130ST EQ Reflector Telescope is a step up from the standard SpaceProbe 130 EQ for the more serious beginning or intermediate stargazer who wants additional performance, particularly for targeting deep-sky objects. The SpaceProbe 130ST EQ reflector telescope also includes a collimation cap and center-marked primary mirror for easy optical alignment. Short 24 inch long optical tube design for easy portability and fast f/5 focal ratio for pleasing wide-field performance makes the SpaceProbe 130ST EQ a very versatile telescope the whole family can enjoy.
Reviews
Find Best Price at Amazon"This telescope is incredible!"
"My three-year-old daughter was really into finding the moon – she has this weird ability to spot it in the sky immediately whenever it’s visible. But other than looking at stars (and you can really see a TON more than with the naked eye – it’s amazing), I initially didn’t know what else to do with it or how to find objects in the sky or even how to use the mount (tip: visit Orion’s website; Ken will show you). Seven months later, I was reading something an astronomy professor wrote in which he mentioned seeing the rings of Saturn through a telescope when he was a kid– I don’t know why, but I had assumed my reasonably priced device was not capable of seeing detail that far away. After reading that, I took the telescope out again, found Saturn and the profanities just flowed like a waterfall once again. If I ever manage to save up enough for a four foot-long “light bucket”, I’ll get clearer and brighter views of dim deep space objects like faint nebulae and galaxies, but for brighter objects like planets, this will likely stay my telescope of choice due to its size and portability."
"I have small two door car and would not have been able to fit the tub in the trunk and only in the passenger seat. This scope is on a Equatorial Mount which would be needed if you wished to take long exposure AstroPhotography or wanted to have a the telescope track objects in the sky without having to continually adjust. It provided a very bright telescope ( f/5 ) with a wide field of view which was recommend to me to be better for a beginner. The mount could later be upgraded to attach a motor to automatically track objects. A Orion Shorty 1.25" 2x Barlow Lens to help with magnification ( The long tube version of this scope Orion SpaceProbe 130 EQ Reflector has a longer focal point as well as the Dobsonian reflectors which gets your more magnification for the same eyepeice) and a camera mount/accessories for taking photos. This is my very first telescope and I will give you my opinion in each area of the product as well as issues I ran into as a beginner. INCLUDED ITEMS: It comes with a manual, Orion's starry night software which I found helpful as beginner ( also notifies you of any upcoming events that you may want to watch) , tools for assembly of the telescope ( no hex wrench for collimation i.e. adjusting the mirrors ), collmination cap, and two eye pieces. It would be helpful to have smaller diagrams between steps showing exact controls or parts to move. Add slow control knobs to worm gears. Notes about assembly: I ran into issues at first after installing the counter weight. I assumed something was broken but luckily I figured out that the latitude adjustment bolt needed to be set first. In my case, with the bolt not set the counterweight would flop down and hit the tripod legs. Setting this bolt to 30-40 degrees stops it from BENDING lower and the counterweight stays still now. COLLIMATION: I used the included cap ( place over the focuser or eyepiece tube on the telescope ) to check if the mirrors were aligned. I corrected it today and after over an hour of the learning process I have mine aligned well and it did seem that the moon was sharper then the day before. Here are some of the mistakes a beginner like me made that caused confusion: When you use the collimation cap, you are supposed to see all these "rings" and reflections of the mirrors. Basically, you look down the focuser and with the telescope parallel to the horizon ( in case you drop a screw or tool and don't' want it falling onto the mirror and breaking it! ). I did have to tighten the RA and Dec knobs well to make sure no movement happened, though if you give it a hard nudge or rested your hand on the tube you could accidentally move it slightly. The tripod base was sturdy but once you got to the tube you could tap it and it would bounce slightly and then stabilize. I only found maybe a few parts that felt "cheap" but really, everything worked well and didn't degrade it from performing properly. It is on a equatorial mount which if you plan on growing into the hobby will want to learn how to use. You can adjust the magnification to get very high power with a simple eyepiece upgrade to match other longer focal length scopes. My number one reason for buying this over a Orion xt8 is that I could learn and work with a little bit of everything in this new hobby."

PowerSeeker 127 EQ Telescope (item #21049) PowerSeeker 127 EQ - General Features Quick and easy no-tool setup Slow motion controls for smooth tracking Erect image optics - Ideal for terrestrial and astronomical use Fully coated glass optical components with high transmission coatings for enhanced image brightness and clarity 3x Barlow lens triples the magnifying power of each eyepiece Accessory tray for convenient storage of accessories "The Sky" Level 1 planetarium software with 10,000 object database and enhanced images. No tools are required for assembly! PowerSeekers are designed and manufactured using all fully coated glass optical components with high transmission coatings for enhanced image brightness and clarity. Optical Design: Newtonian Reflector Aperture: 127 mm (5 in) Focal Length: 1000 mm (39.37 in) Focal Ratio: 7.87 Eyepiece 1: 20 mm (0.79 in) Magnification 1: 50 x Eyepiece 2: 4 mm (0.16 in) Magnification 2: 250 x Barlow Lens: 3 x Finderscope: 5x24 Mount: German Equatorial Tripod: Aluminum Accessory Tray: No-Tool Tray with Eyepiece holder CD ROM: "The Sky" Level 1 Weight: 17 lb (7.71 kg) Limiting Stellar Magnitude: 13 Resolution (Rayleigh): 1.1 arcsec Resolution (Dawes): 0.91 arcsec Photographic Resolution: 254 line/mm Light Gathering Power: 329 x Angular Field of View: 0.8 ° Linear Field of View (@1000 yds): 43 ft (13.11 m) Optical Coatings: Aluminum Secondary Mirror Obstruction: 1.6 in (40.64 mm) Secondary Mirror Obstruction by Area: 10.2 % Secondary Mirror Obstruction by Diameter: 32 % Optical Tube Length: 20 in (508 mm). B. All returns must be accompanied by a written statement setting forth the name, address, and daytime telephone number of the owner, together with a brief description of any claimed defects. (310) 328-9560. Fax. Monday-Friday 8AM-4PM PST. Comes with aluminum tripod and accessory tray.Focal Length of Eyepiece 1 (mm) 20 mm (0.79 in).Focal Length of Eyepiece 2 (mm) 4 mm (0.16 in).
Reviews
Find Best Price at Amazon"1) Collimation. This telescope can be collimated easily by eye, if you want to collimate with a laser, you'll have to remove the corrective lens in the focuser tube. 2) The finder scope is unusable. While I agree, it's not the best finder scope out there and lining it up with the telescope can take a long time but, it is possible with time and patients. (note: it is a scope and not a finder, the image is reversed in the finder). 3) I can't see anything out of this thing. You need to collimate the scope and line up the finder scope, the instructions are in the manual for eye collimation (tip: back the focuser tube all the way out when you collimate, doing this will let you see both the secondary mirror and the primary, also note, this went through shipping and if it arrived with all the mirrors aligned and ready to go, get a power ball ticket because you'd be the luckiest person on the planet. 4) The Barlow is useless. Please google and youtube what a barlow is and how to use them, it's not a true lens and once you find out its true purpose, it'll make more sense. 5) The 4mm lens is useless. See my comment on the barlow, using the barlow with the 4mm will tame things a bit, also, get a lens and filter kit with a 15mm and a 9mm lens. One last comment on this issue is, do not try to push the telescope into position with the clutches locked, use the controls on the tripod to position the scope, if you need to make big adjustments, loosen the clutches (should be OK because your telescope is balanced) position the scope to the general area of viewing, lock the clutches and use the controls to fine tune."
"I later bought the Celestron 24mm to 8mm zoom eyepiece, which allows me to zoom in without changing eyepiece, and it works very well on the smaller 76mm telescope, but again blurry images on this one. I decided to order a Celestron 1.25" collimation eyepiece ($30), which can be useful in aligning the optics (the two mirrors) in reflectors like this one. The reason is that Polaris is faint, and every time you move a mirror by a tiny bit (as explained in the Celestron instruction) the star just darts out of view in the eyepiece. Lastly, I ditched all the Celestron recommendations on day and night collimation (using either the celestron collimation eyepiece or the "ring pattern" for out of focus point sources) and did instead the "EYE-DOCTOR TEST" : I wanted to see how sharp I can get this one, when there is no wind, no shake, no atmospherics, no moving planet, no mist etc. With this method (which I seemingly invented, as it is not described anywhere in the instructions nor on the Celestron site) I was finally able to adjust (by very small increments) the three screws on the secondary mirror till I FINALLY got a nice sharp picture of the writing on the letter. To avoid any further issues due to my previous messing around, I first screwed in the secondary mirror (by loosening up the three alignment screws, and pulling in the secondary mirror all the way in until it barely touches the mount), and later pulled out the primary mirror as well(by pulling out all six screws until the whole unit comes out, then reinserting the mirror after making sure the secondary was pointing the right way, straight to the back). Then, using the Celestron collimation eyepiece with its crosshair, I carefully adjusted the secondary and primary orientations (three screws for each mirror) until all the crosshairs overlapped perfectly. In other words, the crosshair in the eyepiece has to overlap perfectly with its reflection through mirrors 1 and 2, and back to the eyepiece. I found (April 2014) that the best way to collimate this (Bird-Jones or catadioptric design)telescope and get nice sharp images is to remove the focusing lens at the bottom of the focusing tube (takes 10 mins), align the secondary and primary mirrors with an inexpensive LASER collimator (mine is an LK1 $30 from seben dot com, takes another 10 mins to do this part), put the corrector lens back in and reinsert the focusing tube (don't touch the lens with your hands, takes around 5 mins). The secondary (smaller, flat) mirror is oval-shape and mounted right under the focusing tube, held in place by three (outside)-plus-one (center) screws. Now put a focusing cap (just an eyepiece cap with a small 1mm hole in the center) at the (top) end of the focusing tube. Then make absolutely sure (after you take again very carefully the correcting lens out of the focusing tube) that the inside of the focusing tube and the secondary mirror, as viewed through the focuser, are perfectly concentric when you view them through the hole in the cap. That is, the secondary mirror has to be perfectly centered when viewed from the top of the focusing tube. After this is done, make also sure that the tilt on the secondary mirror is such that you can see the center of the primary mirror (on mine I put a black pen mark at the dead center). Now re-align the secondary and primary mirrors with a laser (in my case), with the cap with a hole, or a cheshire eyepiece."
"The instruction manual is weak in this regard and Celestron really should update it to help getting this telescope aligned. If you visit various astronomy forums and ask about this scope, most people will tell you to avoid it because of the time you will be spending collimating it. After you spent time collimating it, then the views are pretty good for the price you pay. I could see the 2 main bands on Jupiter and the moons, the rings of Saturn, but struggled to see the Cassini division. This is the benefits with using an EQ mount where you will only need to turn one knob to keep your object in view."
Best Telescopes
PowerSeeker 127 EQ Telescope (item #21049) PowerSeeker 127 EQ - General Features Quick and easy no-tool setup Slow motion controls for smooth tracking Erect image optics - Ideal for terrestrial and astronomical use Fully coated glass optical components with high transmission coatings for enhanced image brightness and clarity 3x Barlow lens triples the magnifying power of each eyepiece Accessory tray for convenient storage of accessories "The Sky" Level 1 planetarium software with 10,000 object database and enhanced images. No tools are required for assembly! PowerSeekers are designed and manufactured using all fully coated glass optical components with high transmission coatings for enhanced image brightness and clarity. Optical Design: Newtonian Reflector Aperture: 127 mm (5 in) Focal Length: 1000 mm (39.37 in) Focal Ratio: 7.87 Eyepiece 1: 20 mm (0.79 in) Magnification 1: 50 x Eyepiece 2: 4 mm (0.16 in) Magnification 2: 250 x Barlow Lens: 3 x Finderscope: 5x24 Mount: German Equatorial Tripod: Aluminum Accessory Tray: No-Tool Tray with Eyepiece holder CD ROM: "The Sky" Level 1 Weight: 17 lb (7.71 kg) Limiting Stellar Magnitude: 13 Resolution (Rayleigh): 1.1 arcsec Resolution (Dawes): 0.91 arcsec Photographic Resolution: 254 line/mm Light Gathering Power: 329 x Angular Field of View: 0.8 ° Linear Field of View (@1000 yds): 43 ft (13.11 m) Optical Coatings: Aluminum Secondary Mirror Obstruction: 1.6 in (40.64 mm) Secondary Mirror Obstruction by Area: 10.2 % Secondary Mirror Obstruction by Diameter: 32 % Optical Tube Length: 20 in (508 mm). B. All returns must be accompanied by a written statement setting forth the name, address, and daytime telephone number of the owner, together with a brief description of any claimed defects. (310) 328-9560. Fax. Monday-Friday 8AM-4PM PST. Comes with aluminum tripod and accessory tray.Focal Length of Eyepiece 1 (mm) 20 mm (0.79 in).Focal Length of Eyepiece 2 (mm) 4 mm (0.16 in).
Reviews
Find Best Price at Amazon"1) Collimation. This telescope can be collimated easily by eye, if you want to collimate with a laser, you'll have to remove the corrective lens in the focuser tube. 2) The finder scope is unusable. While I agree, it's not the best finder scope out there and lining it up with the telescope can take a long time but, it is possible with time and patients. (note: it is a scope and not a finder, the image is reversed in the finder). 3) I can't see anything out of this thing. You need to collimate the scope and line up the finder scope, the instructions are in the manual for eye collimation (tip: back the focuser tube all the way out when you collimate, doing this will let you see both the secondary mirror and the primary, also note, this went through shipping and if it arrived with all the mirrors aligned and ready to go, get a power ball ticket because you'd be the luckiest person on the planet. 4) The Barlow is useless. Please google and youtube what a barlow is and how to use them, it's not a true lens and once you find out its true purpose, it'll make more sense. 5) The 4mm lens is useless. See my comment on the barlow, using the barlow with the 4mm will tame things a bit, also, get a lens and filter kit with a 15mm and a 9mm lens. One last comment on this issue is, do not try to push the telescope into position with the clutches locked, use the controls on the tripod to position the scope, if you need to make big adjustments, loosen the clutches (should be OK because your telescope is balanced) position the scope to the general area of viewing, lock the clutches and use the controls to fine tune."
"I later bought the Celestron 24mm to 8mm zoom eyepiece, which allows me to zoom in without changing eyepiece, and it works very well on the smaller 76mm telescope, but again blurry images on this one. I decided to order a Celestron 1.25" collimation eyepiece ($30), which can be useful in aligning the optics (the two mirrors) in reflectors like this one. The reason is that Polaris is faint, and every time you move a mirror by a tiny bit (as explained in the Celestron instruction) the star just darts out of view in the eyepiece. Lastly, I ditched all the Celestron recommendations on day and night collimation (using either the celestron collimation eyepiece or the "ring pattern" for out of focus point sources) and did instead the "EYE-DOCTOR TEST" : I wanted to see how sharp I can get this one, when there is no wind, no shake, no atmospherics, no moving planet, no mist etc. With this method (which I seemingly invented, as it is not described anywhere in the instructions nor on the Celestron site) I was finally able to adjust (by very small increments) the three screws on the secondary mirror till I FINALLY got a nice sharp picture of the writing on the letter. To avoid any further issues due to my previous messing around, I first screwed in the secondary mirror (by loosening up the three alignment screws, and pulling in the secondary mirror all the way in until it barely touches the mount), and later pulled out the primary mirror as well(by pulling out all six screws until the whole unit comes out, then reinserting the mirror after making sure the secondary was pointing the right way, straight to the back). Then, using the Celestron collimation eyepiece with its crosshair, I carefully adjusted the secondary and primary orientations (three screws for each mirror) until all the crosshairs overlapped perfectly. In other words, the crosshair in the eyepiece has to overlap perfectly with its reflection through mirrors 1 and 2, and back to the eyepiece. I found (April 2014) that the best way to collimate this (Bird-Jones or catadioptric design)telescope and get nice sharp images is to remove the focusing lens at the bottom of the focusing tube (takes 10 mins), align the secondary and primary mirrors with an inexpensive LASER collimator (mine is an LK1 $30 from seben dot com, takes another 10 mins to do this part), put the corrector lens back in and reinsert the focusing tube (don't touch the lens with your hands, takes around 5 mins). The secondary (smaller, flat) mirror is oval-shape and mounted right under the focusing tube, held in place by three (outside)-plus-one (center) screws. Now put a focusing cap (just an eyepiece cap with a small 1mm hole in the center) at the (top) end of the focusing tube. Then make absolutely sure (after you take again very carefully the correcting lens out of the focusing tube) that the inside of the focusing tube and the secondary mirror, as viewed through the focuser, are perfectly concentric when you view them through the hole in the cap. That is, the secondary mirror has to be perfectly centered when viewed from the top of the focusing tube. After this is done, make also sure that the tilt on the secondary mirror is such that you can see the center of the primary mirror (on mine I put a black pen mark at the dead center). Now re-align the secondary and primary mirrors with a laser (in my case), with the cap with a hole, or a cheshire eyepiece."
"The instruction manual is weak in this regard and Celestron really should update it to help getting this telescope aligned. If you visit various astronomy forums and ask about this scope, most people will tell you to avoid it because of the time you will be spending collimating it. After you spent time collimating it, then the views are pretty good for the price you pay. I could see the 2 main bands on Jupiter and the moons, the rings of Saturn, but struggled to see the Cassini division. This is the benefits with using an EQ mount where you will only need to turn one knob to keep your object in view."
Best Binoculars, Telescopes & Optics
PowerSeeker 127 EQ Telescope (item #21049) PowerSeeker 127 EQ - General Features Quick and easy no-tool setup Slow motion controls for smooth tracking Erect image optics - Ideal for terrestrial and astronomical use Fully coated glass optical components with high transmission coatings for enhanced image brightness and clarity 3x Barlow lens triples the magnifying power of each eyepiece Accessory tray for convenient storage of accessories "The Sky" Level 1 planetarium software with 10,000 object database and enhanced images. No tools are required for assembly! PowerSeekers are designed and manufactured using all fully coated glass optical components with high transmission coatings for enhanced image brightness and clarity. Optical Design: Newtonian Reflector Aperture: 127 mm (5 in) Focal Length: 1000 mm (39.37 in) Focal Ratio: 7.87 Eyepiece 1: 20 mm (0.79 in) Magnification 1: 50 x Eyepiece 2: 4 mm (0.16 in) Magnification 2: 250 x Barlow Lens: 3 x Finderscope: 5x24 Mount: German Equatorial Tripod: Aluminum Accessory Tray: No-Tool Tray with Eyepiece holder CD ROM: "The Sky" Level 1 Weight: 17 lb (7.71 kg) Limiting Stellar Magnitude: 13 Resolution (Rayleigh): 1.1 arcsec Resolution (Dawes): 0.91 arcsec Photographic Resolution: 254 line/mm Light Gathering Power: 329 x Angular Field of View: 0.8 ° Linear Field of View (@1000 yds): 43 ft (13.11 m) Optical Coatings: Aluminum Secondary Mirror Obstruction: 1.6 in (40.64 mm) Secondary Mirror Obstruction by Area: 10.2 % Secondary Mirror Obstruction by Diameter: 32 % Optical Tube Length: 20 in (508 mm). B. All returns must be accompanied by a written statement setting forth the name, address, and daytime telephone number of the owner, together with a brief description of any claimed defects. (310) 328-9560. Fax. Monday-Friday 8AM-4PM PST. Comes with aluminum tripod and accessory tray.Focal Length of Eyepiece 1 (mm) 20 mm (0.79 in).Focal Length of Eyepiece 2 (mm) 4 mm (0.16 in).
Reviews
Find Best Price at Amazon"1) Collimation. This telescope can be collimated easily by eye, if you want to collimate with a laser, you'll have to remove the corrective lens in the focuser tube. 2) The finder scope is unusable. While I agree, it's not the best finder scope out there and lining it up with the telescope can take a long time but, it is possible with time and patients. (note: it is a scope and not a finder, the image is reversed in the finder). 3) I can't see anything out of this thing. You need to collimate the scope and line up the finder scope, the instructions are in the manual for eye collimation (tip: back the focuser tube all the way out when you collimate, doing this will let you see both the secondary mirror and the primary, also note, this went through shipping and if it arrived with all the mirrors aligned and ready to go, get a power ball ticket because you'd be the luckiest person on the planet. 4) The Barlow is useless. Please google and youtube what a barlow is and how to use them, it's not a true lens and once you find out its true purpose, it'll make more sense. 5) The 4mm lens is useless. See my comment on the barlow, using the barlow with the 4mm will tame things a bit, also, get a lens and filter kit with a 15mm and a 9mm lens. One last comment on this issue is, do not try to push the telescope into position with the clutches locked, use the controls on the tripod to position the scope, if you need to make big adjustments, loosen the clutches (should be OK because your telescope is balanced) position the scope to the general area of viewing, lock the clutches and use the controls to fine tune."
"I later bought the Celestron 24mm to 8mm zoom eyepiece, which allows me to zoom in without changing eyepiece, and it works very well on the smaller 76mm telescope, but again blurry images on this one. I decided to order a Celestron 1.25" collimation eyepiece ($30), which can be useful in aligning the optics (the two mirrors) in reflectors like this one. The reason is that Polaris is faint, and every time you move a mirror by a tiny bit (as explained in the Celestron instruction) the star just darts out of view in the eyepiece. Lastly, I ditched all the Celestron recommendations on day and night collimation (using either the celestron collimation eyepiece or the "ring pattern" for out of focus point sources) and did instead the "EYE-DOCTOR TEST" : I wanted to see how sharp I can get this one, when there is no wind, no shake, no atmospherics, no moving planet, no mist etc. With this method (which I seemingly invented, as it is not described anywhere in the instructions nor on the Celestron site) I was finally able to adjust (by very small increments) the three screws on the secondary mirror till I FINALLY got a nice sharp picture of the writing on the letter. To avoid any further issues due to my previous messing around, I first screwed in the secondary mirror (by loosening up the three alignment screws, and pulling in the secondary mirror all the way in until it barely touches the mount), and later pulled out the primary mirror as well(by pulling out all six screws until the whole unit comes out, then reinserting the mirror after making sure the secondary was pointing the right way, straight to the back). Then, using the Celestron collimation eyepiece with its crosshair, I carefully adjusted the secondary and primary orientations (three screws for each mirror) until all the crosshairs overlapped perfectly. In other words, the crosshair in the eyepiece has to overlap perfectly with its reflection through mirrors 1 and 2, and back to the eyepiece. I found (April 2014) that the best way to collimate this (Bird-Jones or catadioptric design)telescope and get nice sharp images is to remove the focusing lens at the bottom of the focusing tube (takes 10 mins), align the secondary and primary mirrors with an inexpensive LASER collimator (mine is an LK1 $30 from seben dot com, takes another 10 mins to do this part), put the corrector lens back in and reinsert the focusing tube (don't touch the lens with your hands, takes around 5 mins). The secondary (smaller, flat) mirror is oval-shape and mounted right under the focusing tube, held in place by three (outside)-plus-one (center) screws. Now put a focusing cap (just an eyepiece cap with a small 1mm hole in the center) at the (top) end of the focusing tube. Then make absolutely sure (after you take again very carefully the correcting lens out of the focusing tube) that the inside of the focusing tube and the secondary mirror, as viewed through the focuser, are perfectly concentric when you view them through the hole in the cap. That is, the secondary mirror has to be perfectly centered when viewed from the top of the focusing tube. After this is done, make also sure that the tilt on the secondary mirror is such that you can see the center of the primary mirror (on mine I put a black pen mark at the dead center). Now re-align the secondary and primary mirrors with a laser (in my case), with the cap with a hole, or a cheshire eyepiece."
"The instruction manual is weak in this regard and Celestron really should update it to help getting this telescope aligned. If you visit various astronomy forums and ask about this scope, most people will tell you to avoid it because of the time you will be spending collimating it. After you spent time collimating it, then the views are pretty good for the price you pay. I could see the 2 main bands on Jupiter and the moons, the rings of Saturn, but struggled to see the Cassini division. This is the benefits with using an EQ mount where you will only need to turn one knob to keep your object in view."
Best Telescope Refractors
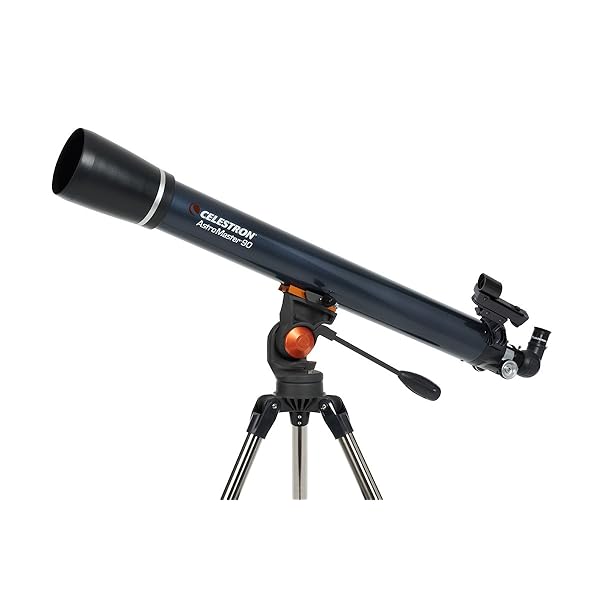
With its time tested durability and high quality optics at an affordable price, the Celestron Astro Master makes a great first telescope! As a bonus, Celestron has included a nice selection of accessories for your new telescope with this purchase, which means you will be observing the same day you unpack the box. Accessories include two full-sized eyepieces, a Star Pointer finderscope for easy location of objects you wish to observe, and even software for your PC. With it’s fully illustrated quick set up guide, the telescope is easy to assemble, and the package includes an erect image prism, high and low power eyepieces, and astronomy software for your PC. The sharp optics produce a right side up image, the mount is easy to use, and the included planetarium software helps you find planets in the night sky. Crisp clear views both day and night Rugged refractor design Quick and easy no-tool set up Erect image prism and two eyepieces included. Enter your model number to make sure this fits.
Reviews
Find Best Price at Amazon"This scope is plenty powerful enough to check out the moon in great detail, Jupiter (you can see the cloud bands) and Saturn (rings are visible). There are threads on the bottom of the scope's dovetail mount that allow you to mount it to a standard tripod and that wins lots of brownie points with me."
"It takes patience, and a little bit of luck in snapping the photo, but I have captured some images that have provided a lot of enjoyment."
"So far, we've only taken it out for one night of stargazing, but so far we love it."
"Bought as a birthday gift and my son-in-law loved it."
"Easy to use but can't see the planets all that well, you can barely make out the rings of Saturn but despite it showing up super tiny it's still really cool to see nonetheless."
"This is a good beginners telescope."
"I easily found Jupiter, sighted it in with the red dot finder (move your head until the two red dots make a single point and put that point on the object you want to look at), and then looked at it with the 20mm, adjusting the focus knob only a little. I switched over to the 9mm and saw to my amazement Jupiter's orangish colored cloud bands as well as all 4 moons quite clearly. I had no issues with the stand (I was actually impressed with how well it was made for a telescope this cheap) but I had it at it's lowest point as I like to sit on the ground on a blanket and spread my stuff around me."
"This is sort of like having a point and shoot camera as opposed to a complicated SLR. The scope was incredibly easy to set up right out of the box. The only complaint I would have is that the accessories tray doesn't fold up with the tripod part, you have to remove it."
Best Catadioptric Telescopes
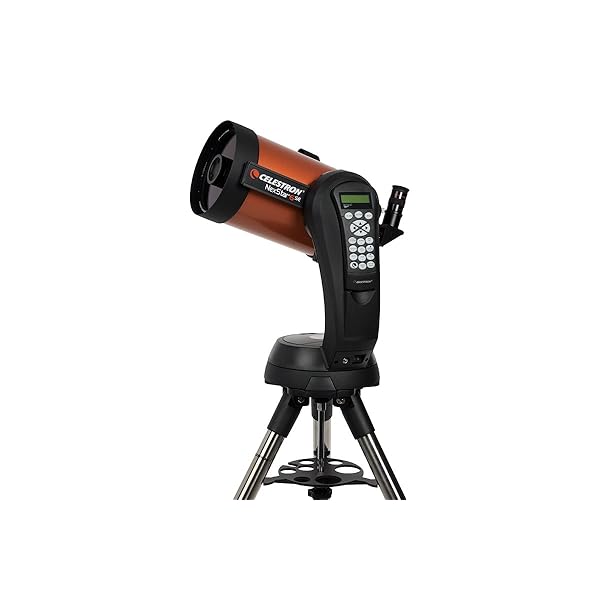
View the Universe’s Most Impressive Celestial Objects The 6SE’s six-inch primary mirror packs enough light-gathering ability to observe the best that the solar system has to offer: Cassini’s Division in Saturn’s rings, the cloud bands on Jupiter, and geographic features on the surface of the Moon. When it comes to deep sky objects, take your 6SE to a dark-sky site and you’ll see hundreds of pinpoint stars in the Hercules Globular Cluster, the spiral arms of the Whirlpool Galaxy, and more. Sturdy construction from high-quality components give NexStar SE the pointing and tracking accuracy needed to observe and follow your favorite targets with push-button ease. With a total weight of 30 pounds including the tripod, the ultra portable 6 SE features a precision optical system with 1500mm focal length (f10) and offers 44% more light gathering than a 5-inch telescope. In the tradition of Celestron's famous orange optical tubes, the NexStar SE Family combines the classic heritage of the original orange tube telescopes with state-of-the-art features including a fully computerized operating system, flash upgradeable hand control, our superior StarBright XLT coatings, our revolutionary SkyAlign telescope alignment software, and much more. Whether you are a seasoned astronomer looking for a portable scope with advanced features, or just starting your astronomy adventure and looking for an easy way to enjoy the night sky, a NexStar SE will help you take a closer look. Even if you’re unfamiliar with the night sky, you can easily align your telescope on any three bright objects.
Reviews
Find Best Price at Amazon"I would also suggest getting the Celestron Star Sense Auto Align, it will save time and that means more viewing."
"Optics: 10/10. Goto: 8/10. Tracking: 8:10. Portability: 7/10. Eyepiece: 7/10. Battery Life: 4/10. Strength of tripod: 10/10. Magnification: 10/10. Light Gathering: 9/10. So this telescope is really cool and fun to use and I will buy an AC adapter later. This telescope is the best I have Ever Had and Is worth the $800.00. Update 11/30/13: I live in a very heavy light polluted sky and no deep sky objects are visible to the naked eye."
"The single arm mount seems very solid though the spur gears are not optimal for fine tracking needed for loooong exposure astrophotography. I'm impressed with how well it does track though as I've centered an image and come back 2 hours later to find it still centered exactly as I left it so far as I can tell (visual observation, not using a camera). As far as my original goal of portability goes, I found a cheap hardside suitcase which the packing foam fits in perfectly that makes transportation to observing sights a dream."
"Fantastic telescope, so much so that when I showed my future wife Saturn on our first date she fell in love with me."