
Best Slide & Negative Scanners
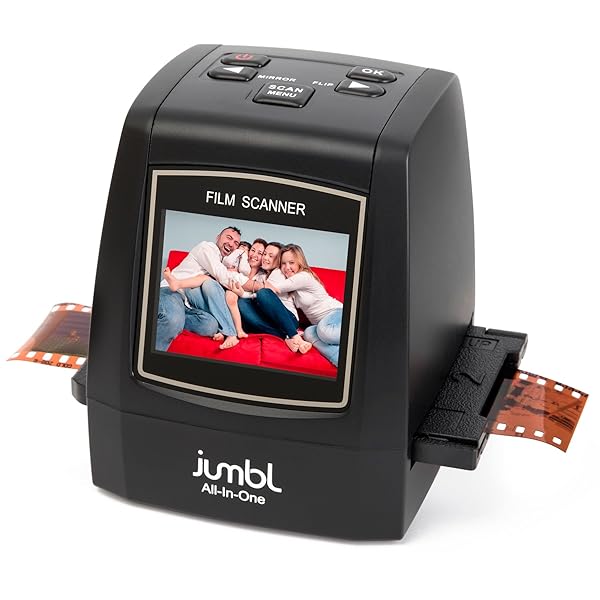
This scanner sports a powerful 14-megapixel sensor that reads every detail contained in your 35mm, 110, 126, and Super 8 slides and negatives. You can choose between the standard 14-megapixels scan, or enable the built-in software interpolation, which applies some image magic and ups the quality to an astonishing 22MP. Simply push them into the device, and you can feed in slides or negatives one after the after without needing to remove and reload the adapters. Video Out for TV Connection (Cable Included); Mac & PC Compatible.
Reviews
Find Best Price at Amazon"Having read a bunch of online resourced about various film scanning solutions I knew I had a few options. Dedicated film scanners would be great, but expensive for a good one, and still very tedious. So I looked around at some cheap consumer film scanners and decided to give this one a shot. I had the rolls developed and scanned on Noritsu scanners by a professional lab. I included a photoshop aligned image showing just how much cropping is going on. - Screen is total crap. Viewing angles are so bad just sitting in front of it puts you high enough to wash it out. Low res, bad colors, don't bother trying to eyeball exposure or color on this. - Interface is clunky, you can easily get the hang of it, but it's just not all that great. - Build quality feels really cheap. - Tried running Super 8 through it, way too much of a pixelated mess to really make out what it was, not worth it. Running negatives through this machine is pretty easy. The screen refresh rate is decent so you just line up the image, flip or reverse as needed, and then scan. The scanner is actively trying to cancel out the orange mask so color and exposure can vary just by moving the negative strip back and forth. Hitting the auto fix button in most programs will do a wildly better color correction job than this cheapo scanner could ever dream up. On a positive note, black and white negatives look great, no color to screw around with. It will never be perfect however because of a complete lack of Digital ICE or similar infrared technology seen in many high end film scanners and flatbeds. With some quick editing on the computer, you can totally make a usable image for basic sharing."
"If you are the sort who has a large collection of slides and wants to know the breakeven point between the cost of having a service scan your media or do it yourself, the average price for an outside service is in the 22-25 cent range per slide. If you need to scan over 500 slides this becomes the best value (assuming that the value of your time is not factored into the equation.). That is for slides - I did not check the cost of the other media this device will scan. At 14MP you can scan a little over 6500 slides, and at 22MP about 4100."
"The flat bed scanner can scan 12 frames at once without truncation and without having to line up each frame, and the resulting image color is accurate (without even having to mess around with color settings)."

Display: 2.4” Color TFT LCD. Focus Range: Fixed Focus. Exposure Control: Automatic / Manual (-2.0 EV~ +2.0EV). White Balance: Automatic. Recording Resolution: 14 Megapixels / 22 Megapixels (interpolation). Scan Quality: 3200 DPI & 4000 DPI (interpolation). Picture Aspect Ratio: 3:2. Scan Method: Single Pass. View your scanned slides and films with the built-in, vibrant full color, 2.4 inch LCD screen or directly onto your television with the included Video Out TV cable. The easy to use SD card slot expansion allows you to hold even more of your high resolution images until you are ready to transfer them to your computer, smartphone, tablet or digital picture frame.
Reviews
Find Best Price at Amazon"The scanner has rudimentary controls for color-balance and brightness correction of images built-in, in rather large increments, so make a best guess in scanner and then be prepared to do some additional tweaking of the images in Photoshop or another image-manipulation program to get the images as gorgeous as you remember them. I've been saving my images to an SD card, then inserting that SD card via SD card reader into the USB slot in my computer, and it's been great--the computer simply recognizes the scanned images as from any other digital device, at which point you can simply upload them to your computer's hard drive."
"Should have bought this 20 years ago... but I knew that I'd be like a pro and learn Photoshop and scan all my old family slides on a real scanner, them take time to carefully adjust them perfectly for the world to see. Checked them on the computer to flip, color adj some, them viewed them on the 55" tv -----after 50 + years of gathering dust in the garage. The USB power connector came partially unplugged from the machine since I was doing this from my Lazy Boy and moving it around."
"When I first opened the box, plugged the scanner in and looked at the manual, I just about threw up! After 15 minutes with the manual, I was an inch away from packing it all back in the box and returning it to Amazon. The end results are great, though with the 40+ year old slides I'm digitizing, the colors are off and for the ones I care about I'll spend a little time with Photoshop."
"One complaint is the intermittent freezes that occur."
"Setting up is sort of challenging since the instructions are lacking in detail, especially the adjustment of color and contrast."
"It's a good scanner for the price if want to archive slides quickly and you're not over particular about quality or want to do any reprints."
"Thank you for all your considerations."
"Works great!"
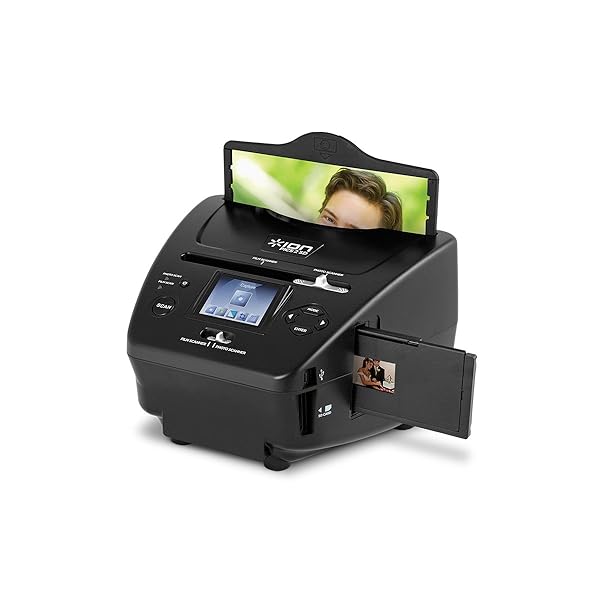
This high-quality scanner transfers your images directly onto an SD card so you can enjoy your old pictures with the latest technology. PICS 2 SD is portable, lightweight, and has an ultra-small footprint so you can take it with you and scan your friends' and family's pictures too. Image Sensor : 5.1 megapixel CMOS sensor Lens Specification : F= 4.83 Color Balance : Automatic Exposure Control : Automatic PC interface : USB 2.0 Scan High Resolution : 2500 DPI interpolation resolution Light Source Back Light : 3 white LED Photo Holders (in inches): 3.5x5 / 4x6 / 5x7 System Requirements : Windows; XP / Windows Vista™ (32-bit or 64-bit) / Windows 7 Power : From USB port Dimensions : 8.7” x 8.2” x 5.8”. Scans your pictures, slides and negatives to the included SD card --no computer needed!
Reviews
Find Best Price at Amazon"Is stand-alone "camera in a box" and came with an SD card so you can do a bunch of pictures before you download to a computer (either by reading the SD card or by plugging in the device, which then acts like a thumbdrive.). Overall comment -- the device "crops" your pictures assuming a 1/4" border and slides/negs assuming typical slide-mount. Also note that old negatives may have shifted in color (like old fotos). For photos -- here found a design issue. Most pictures (especially pictures with lots of color and busy background, like crowds, etc) come through fine, but on pictures with lots of dark AND some light you will see either a "loss of contrast" (darks not as dark) with matte finish photos or actual circular shadows (reflections of camera lens and surrounding structure) on glossy prints. For 4x6 or 3x5 try setting the device for the next size up (use 5x7 setting for 4x6 in the 4x6 frame) -- you will get some edges that you will have to crop off with other software but at least you will get 98% of teh pix. Oh, and suggest you cut some 3x5/4x6/5x7 rectangles of flat black paper or poster as the picture holders have a glossy back (note comment about lens reflection above)."
"Works as expected."
"Fast Service."
"Used once and it does work well."
"This worked ok but did not take the quality of pictures that I was looking for."
Best Flatbed Scanners
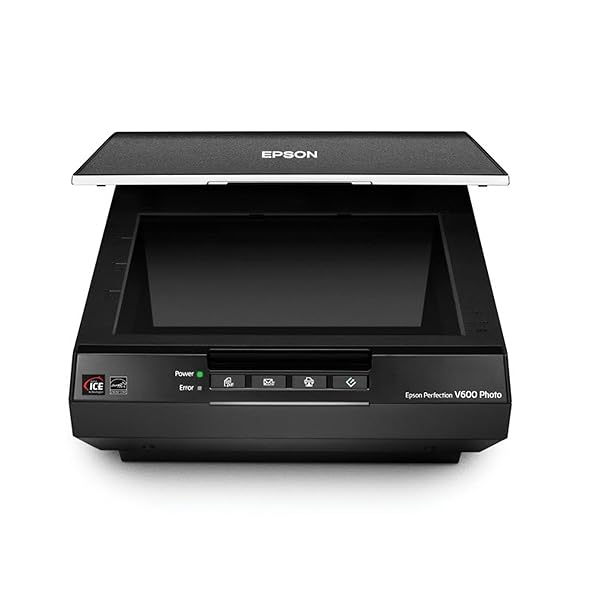
— The Epson Perfection V600 Photo delivers outstanding quality scans from photos, film, slides and everyday documents. Featuring DIGITAL ICE for both film and prints, one-touch color restoration and. Arcsoft Photostudio. , this scanner provides a complete photo restoration solution. 6400 x 9600 dpi for film Enlargements up to 17” x 22” Built-in Transparency Unit (TPU) For slides, negatives and medium-format film. up to 6 x 22 cm Scan everything you need Film, photos, documents, invoices, receipts, books, magazines and 3D objects Complete photo restoration solution. Before. After. Before. After. Before. After. DIGITAL ICE for Prints Remove the appearance of tears. and creases from damaged photos DIGITAL ICE for Film Remove the appearance of dust and. scratches from film Easy Photo Fix For one-touch color restoration Increased productivity. ReadyScan LED technology Fast scanning and no warm-up time Optical Character Recognition (OCR) For converting scanned documents into editable text Four customizable buttons Instantly copy, scan-to-email and create PDF’s Features/Benefits Create extraordinary enlargements from film — 6400 x 9600 dpi for enlargements up to 17" x 22" Scan slides, negatives and medium–format panoramic film — built-in Transparency Unit Remove the appearance of tears and creases from damaged photos — DIGITAL ICE for Prints Remove the appearance of dust and scratches from film — DIGITAL ICE for Film Restore faded color photos with one touch — Epson Easy Photo Fix included Achieve greater productivity — convert scanned documents into editable text with ABBYY FineReader Sprint Plus OCR Quickly complete any task — instantly scan, copy, scan-to-email and create PDFs with four customizable buttons Energy-efficient LED for fast scans — exclusive ReadyScan LED light source means no warmup time, faster scans and lower power consumption Take your photos further — Arcsoft Photostudio included, to help edit and enhance your digital images Weight and Dimensions (W x D x H) — Weight: 9.0 lb, Dimensions: 11" x 19" x 4.6". What's in the Box Perfection V600 Photo color scanner Transparency unit (built into lid) Film holders for: 35mm film and mounted slides & 6 x 22 cm medium-format film Scanner software CD-Rom Arcsoft Photostudio DVD Start Here poster Hi-Speed USB 2.0 cable AC adapter and power cable. Remove the appearance of dust and scratches from film — DIGITAL ICE for Film.
Reviews
Find Best Price at Amazon"11th Day Update: all 5400 slide transparencies (35mm mounted slides) have been scanned (at 2400dpi) and burned to DVDs. That was with only selective use of Color Restoration, which doesn't add anytime to the scan. We would look at each set of 4 preview images and click and highlight the ones we wanted to color restore (click on the slide, do NOT click on the checkbox...leave the checkbox on each preview CHECKED ON...that's what lets the scanner know you want to scan all 4 slides that you just previewed). Background: BFA in Art with concentration in Darkroom Photography; Own my own darkroom for 25 years; Decade as an Imaging Specialist/Scanner Operator (you can skip the next few paragraphs and get to the settings which worked well for us while scanning a bunch of old slides). Every day for a decade, 8 hours a day I used PhotoShop 3.0+, flatbed scanners, image setters and even a Nikon Coolscan slide scanner with an automatic slide-feeder. As I recall the slide feeder could hold about 40 mounted slides and took about 8 minutes per slide to scan. I wanted to set up a new, easy scan station for my father to scan his old slides: 54 slide projector carousels (round thingies) filled with a maximum 100 slides each. SETTINGS FOR SLIDE SCANNING. I installed the CD software, then plugged in the machine, and finally I turned it on with the ON/OFF button HIDDEN on the right side of the machine. So, for decent slide scans here is a nice setting list: Mode = Professional. Document type = Positive film. Image Type = 48-bit. Resolution = 2400 dpi. CHECK the unsharp mask box to turn it on, set level to LOW. CHECK the Color Restoration box to turn it on. Click preview, select and flip any upside-down slides with the options. Click Scan and sit back and wait while all 4 slides are scanned (a little under 4 minutes to scan and auto-name and auto-save). ACTUAL PROJECT: Each slide takes 1 minute to scan, auto-name and auto-save. 54 boxes of slides x 100 slides each = 5400 slides. Yes, at about 1 minute per slide it's a little slower (at 2400dpi) but you can save a little time and scan at 1200dpi, or even go down to 100dpi, lol. A minute per slide is a lot slower than 1 second per slide. I'd rather spend two weeks getting 5,400 great scans then spend 5 hours getting crappy scans that look terrible and I'll end up deleting. WHAT DIDN'T WORK WELL (FOR US) AND WHAT DID. First off, use the professional mode for slides. The automatic easy mode has drawbacks: it only allows 1200dpi scans at the highest setting; even though it's only 1200dpi it seems to take longer than the professional mode at 2400dpi; even though in the manual it says you can skip the preview...it actually does one preview at a time and shows that to you while it scans, which means the preview portion takes FOUR times as long. Also, when you select the color restoration option: the little preview is color restored, but the scan isn't! So: it takes 2x-4x as long and doesn't actually apply color restoration to the scan that is autosaved to your computer. Thus: if you want to scan, color restore and sharpen you have to use the professional mode (and re-check the color restoration box after selection "all" 4 previews with the blue frame highlighting them AFTER EVERY PREVIEW!!!!). I fiddled a little with the grain removal setting, but it just kind of blurred my test slides. There are other settings were you want to: UNcheck the write over files with the same name (why would you want to overwrite your previous scans? TIFFs are still a tad bigger, but if you're scanning once and then throwing away your slides then scan huge and save as TIFF for that once in a lifetime chance of archiving. Somewhere in the advanced settings option when you first open Epson Scan you can also uncheck the "include color profiles" box. Unless you're sending your files to a professional printing press that needs specific color profiles THIS JUST BLOATS THE SIZE OF EACH OF YOUR SCANS! I don't care about LAB COLOR vs CMYK vs Srgb ICC profiles and when I was a professional our printers (and by printers I mean the humans who ran huge color printing presses that are about 40' long) would set their prepress to strip out/ignore any color profiles accidentally left attached to image files we sent them...because THEY wanted to control the color, not some random file that nobody on our end looked at or modified or fixed or cared about. UNLESS YOU'RE A PROFESSIONAL PHOTOGRAPHER SENDING SCANS TO A COLOR PRINT PUBLICATION THAT REQUIRES YOU TO SEND ALONG COLOR PROFILES uncheck the box and save space on your computer. Click on Epson Scan. Select "Professional" and "Current Settings". 2400dpi. Check color restoration box on. Check unsharp max on / Medium. Dust spray and put in 4 slides. ****VERY IMPORTANT STEP RIGHT HERE: Click the "ALL" button the highlight all four previews with blue frames and then click "RESTORE COLOR CHECKBOX TO ON"/ (The color restoration feature shuts itself off after every preview, and if you turn it back on it only applies to the previews with blue frames around them!). This is for "pros" who only color restore 1 out of every 4 slides or whatever. Computer (we have a 2/3 year old Dell with i5 core processor and Windows 10, regular non-solid state hard drive). This Scanner. Dust-off Sprayer. USB Thumbdrive (archive 1). Blank DVDs (archive 2 or more if you burn multiple copies to send to various relatives). External HD (archive 3). Time: 1 minute per slide. This thing is heavier than my 25 year old Umax PowerLook III scanner which was used in by my at my job in a multi-million dollar publishing empire. I don't know who got to take home the Nikon CoolScan slide scanner (w/auto-feeder), LOL! Do you have only a month to scan 50,000 slides? Well, then contract a vendor to do them for 60 cents per slide and then sell you an external hard drive with your scans on it...plus shipping...plus expedited service...plus insurance which will give you a few dollars if the shipper looses all your slides so instead of your photos you'll have like $300 and the horror of loosing priceless, irreplaceable pictures. By the way: for my 5,400 slides it would cost at least $3,240 to have them scanned (plus shipping, plus hard drive they return the scans on, etc.). If anything I gave you: a template to plan your project/setup/costs & some easy start-up settings to get great slide scans. UPDATE: It's the second day of ownership, and even with our time spent testing settings, setting up a light box, unpacking and dusting off 54 boxes of 100-slide carousel wheels we managed to scan 2 entire boxes out of the 54! The ONLY THING THAT SUCKS ABOUT IT IS: after every 4 slide batch is previewed the "Color Restoration" box UNchecks itself. So you have to select all four previews and ONLY THEN click to check the color restoration box, and then scan. I can spend 5-15 minutes trying to color correct an RGB color image, and even longer for a CMYK image for print (textbook, magazine, book cover, etc.). After you do a few dozen you won't even have to think: your hand will just click ALL and Color Correct and SCAN. Good luck, have fun, spend a day or two scanning and rescanning a few documents to get the perfect settings and physical workflow that works for you!"
"While that sounds like an over whelming task, it has changed my approach to working with my family archives. Rather than simply copy them forward to digital in their original condition, I am being handed an opportunity to improve them. But, with the right mindset you can enjoy the experience of enhancing those photographic captures that you have kept and treasured, but seldom viewed. While in LR, as the last enhancement, edit the photo in a separate software, Noiseless CK. While the process takes time, it is enjoyable and rewarding to see the old memories once again before you in Kodak Carousel brightness and color -- and better. I doubt this machine is up to professional application either in terms of endurance or image quality."
"The second picture was scanned with Digital ICE and you can see how it removed all the dust and imperfections that were left on the slide even though I cleaned it using canned air."
"I got rid of all my darkroom equipment years ago along with all my film cameras, but still had a lot of 6x6 and 35mm negatives and Kodachrome slides. Also, when working with negatives and slides, just like you were working in darkroom, dust is a real PITA at these levels of enlargement."
Best Portable Photo Printers

Connect your social media accounts to the free-to-download HP Sprocket App and instantly turn those photos into colorful prints. A Social on-the-go portable printer: Sprocket uses seamless Bluetooth connectivity, so you can set it up at parties and events, and everyone can print their favorite moments from their smartphones or tablets. Main functions of the Sprocket portable photo printer: 2x3 photo printing on sticky-backed paper, mobile printing - take it anywhere, social media printing - print photos from your social media profiles, Bluetooth smartphone connectivity, and more.
Reviews
Find Best Price at Amazon"Right pic is the original pic from my phone."
"Today we will be taking a look at the white Sprocket so let’s go ahead and check out my video Review!"
"My family travels a lot, my kids like to do Smash book style scrap booking on the go, but now we don't have to rely on crappy Instax instant pictures! Plus, the sticky back makes them easier to get in your smash book!"
"Don't compare this to a full quality printer. Print quality is just fine for adding photos to my planner pages or giving at to friends at dinner or a concert. Yes it's pricey but let's face it, not too many of us print actual photos any more even us die hard scrapbookers at most stick a couple of fun prints in a planner page and call it a day. I purchased this printer specifically to add fun photos to my MAMBI Happy Planner."
"It would have been nice if this came with 'some' instructions beyond a card that demonstrated how to plug it in for charging (of all things to give directions on...). A little frustrated that I can't find replacement paper for this on Amazon but they can be ordered directly through HP in packs of 20 at about .50 cents a sheet (CORRECTION: Amazon does carry the replacement paper - see link in comments section). Insert photo paper with the blue card included, into the sproket (top of device slides and pops off). 3. Open the sprocket app from your device - from here, you'll be able to access your photos, editing tools and initiate a print job."
"The worst part is that you can't print photos that have been edited using your phone. iPhones have a pretty basic editor that allows you to change color, light, etc and the HP app would not read them."